Monday, September 30, 2013

Insider Online Class


Last week I signed up for an online card class offered by Jennifer McGuire, Kristina Werner and Laura Bassen.  It's called Insider.  I've made it through one of the classes so far and am really enjoying playing with the projects.  I've learned a couple of great things so far and have altered a couple of the ideas so that they work better for me and my supplies.

Isn't this cute - a Pop Up inside greeting.  So easy to do and really adds something special to the inside.

For the first card I used Secret Garden for the flower and Betsy's Blossoms for the leaves.  The inside is supposed to have a pop-up flower matching the one on the front, but it just seemed to small to me and I didn't like it for inside, so instead I did the greeting.  I'm really happy with it.


For the 2nd card, I used Field Flowers and just a portion of the stem for the leaves.  Both were done on watercolor paper with some coloring done on the first one, but just 2-step stamping done on the 2nd.


When I've had some more practice, I'll share details on how to do some of the fun pop-up things inside.

Hope you had a great weekend.

Happy Stamping!
~ Donna


Sunday, September 29, 2013

Best of 25 Years Stamps

BEST OF 25 YEARS STAMPS


As part of our 25-year anniversary celebration, we're bringing back some of our favorite stamp images from the last quarter century and combining them into 12 sets, which will release-one set per month-during 2013. Even better, along with some great classic images, each "Best of" set will also include a never-before-seen image!

While we are releasing just one Best of stamp set per month, all of the Best of sets will be available until March 31, 2014.
As a special incentive to collect the Best of stamps, we're including a collector's card and 25-year proof of purchase sticker with every Best of set. Collect six stickers, and send it in to redeem a FREE set of your choice valued up to $14.95! Free sets must be redeemed no later than April 30, 2014.

Click each image below to see the flyer for each month.  Be sure to save your stickers to redeem for a free set of your choice valued up to $14.95!!


December (134393)

November (134387)

October - Best of Christmas (134384)


  September - Best of Autumn (134390)


August - Best of Halloween (134381)


July - Best of Shelli (133488)


June - Best of Greetings (133485)


 May - Best of Brides and Babies (133482)


April - Best of Butterflies (133345)


March - Best of Flowers (133342)


February - Best of Love (132987)


January - Best of Birthdays (132929)


Another Thank You - Clear PhotoPoly

I just love the colors of fall - even though we don't get to see the beautiful changing trees as much here in Phoenix.  So, I decided to make a card with fall colors to help me enjoy them!

This is a super simple card and I really love the Masking Tape Technique.  It comes out different every time, just by changing the size and pressure on the ink.

For this card I used Cajun Craze and Very Vanilla card stock.  The Cajun Craze is cut at 5 1/2" x 8 1/2" and scored at 4 1/4".  The Very Vanilla is 5 1/4" x 4".


I used Daffodil Delight, Pumpkin Pie and Pear Pizzazz for the paint stripes.  Simply use a piece of the blue painters tape found at any hardware store (we prefer Ace rather than the big box home improvement - just to give the little guys the business) and gently lay it across the ink pad of choice and rub gently, then place it on card stock press gently and lift carefully.

The THANK YOU is from Another Thank You Clear Photopolymer stamp set.  LOVE the Photopolies!  It was stamped with Cajun Craze to match the card stock.  When stamping a large stamp like this one, be sure to ink it well and for best results I stand so I can put even pressure across the whole stamp.  Another great thing about the CLEAR stamps is being able to see if it's stamping fully or not.

Take some Linen Thread and wrap it around the corner.  I snipped a small piece into the card stock so it would stay on without sliding off.


Stamps Well With Others Recipe:

Card Stock:  Cajun Craze, Whisper White
Ink:  Daffodil Delight, Pumpkin Pie, Pear Pizzazz, Cajun Craze
Stamps:  Another Thank You Photopolymer Stamp Set (133454)
Linen Thread (104199)
Extras:  Blue Painters Tape

Thank you for looking in today.  May you have a blessed Sunday.

~ Donna

** September 29, 2013 (would have been my Mom's 89th Birthday **  
I miss you Mom... Happy Birthday!

Saturday, September 28, 2013

Simply Sketched Thanks So Much

I spotted this idea on Simple Stampin' by Susan Itell.  Loved the use of ovals to give it a little more color.  Thanks Susan!

I made two cards but like the one on top here best using Melon Mambo instead of the Raspberry Ripple. Other than that, the cards are the same.  Well, that and larger ovals. 


The Simply Sketched set is a Hostess Set, but you can earn it easily enough with our Hostess Benefits by putting in a $150.00 order or gathering some friends together to order with you!

Let me know how I can help!

Thanks for looking in today.  Have a great weekend!

~ Donna

Friday, September 27, 2013

Sunflower Window Card

I found this great idea on Julie Davison's blog and then changed it up for the accessories that I had.  Thanks for the ideas Julie, I love how they came out!


Stampin' Up! Supplies:

Stamps:   Express Yourself (Hostess) 
Ink:   Baked Brown Sugar 
Card Stock:   Whisper White, Daffodil Delight, Wild Wasabi
Tools:  Word Window Punch (119857), Modern Label Punch (119849), Bird Builder Punch (leaves) (117191), Boho Blossom Punch (119858), 1/2" Circle Punch (119869), Window Frames Collection Framelits (129021) 
Extras:  Linen Thread (104199), Baked Brown Sugar 3/8" Ruffle Stretch Ribbon (130022), Stampin' Dimensionals (104430).

Thursday, September 26, 2013

Guest Stamper - Linda - Soccer MVP

Today I wanted to share Linda's awesome Soccer MVP card she made for her nephew.  Isn't it perfect?


Most supplies used are retired, but since  Linda isn't a SU! Demo, she can use whatever she wants!  

Thanks for looking in today.  Happy Thursday!

~ Donna

Tuesday, September 24, 2013

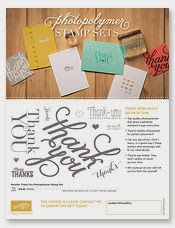
Photopolymer Stamps

We've searched long and hard for just the right material to be able to introduce completely clear stamping. And we've found it. We're excited to announce that we now have wood-mount, clear-mount AND photopolymer stamps! The new photopolymer will be an addition to our stamp line and will appeal to all types of stampers. Our top-quality photopolymer has just enough give to create a perfectly stamped image every time and with the introduction of our firm-foam pads, let's just say they're meant for each other! Photopolymer stamps will also be unique, fun designs that will inspire you and provide more versatile options you may not see in our traditional wood- and clear-mount stamp options. 

What makes them so great?
  • They're entirely transparent for perfect placement every time! 
  • They are durable. The photopolymer material is designed to last. 
  • Can you say sticky? (Don't worry; in a good way.) These stamps stick amazingly well to our clear blocks.
  • They're age tested. They won't yellow or cloud up over time. 
  • We could go on, but we'll let you try them for yourself.
They are clearly a great choice.  Click the pictures below for a better image for each one.

Then go shopping HERE on my website!  The pictures below are special sets that aren't in the Annual Catalog.  By going to my website, you can see ALL the Photopolymer sets available.


  • Not available in wood-mount or clear-mount.  
  • All photopolymer will be packaged in cello bag w/insert, but don't forget you can store them in our clear cases.
Please contact me for any questions you may have about these stamps. I personally LOVE them!

Thanks for looking in today.  This will be linked to the top of my blog so you can always find it!

~ Donna


Monday, September 23, 2013

Ho Ho Ho Make and Take

Here was our Make and Take from our Monday night weSTAMP Team Meeting.  It seems Lorri Heiling (my wonderful upline) and I, think alike, because my swap for the meeting used the "file folder" technique and the Santa's List stamp set!  

This card really came out nice and was very easy to make.  A word of warning though on the HO HO HO.... one of the girls at my table made a little mistake and the first flap said "OH OH OH" and the other one said "HO HO HO".  We all had a good laugh over it!  LOL  


Recipe:

Card Stock:  Real Red, Whisper White, Crumb Cake (?)
DSP:  Season of Style, Silver Glimmer Paper
Stamps:  Santa's List (w-131808 / c-131811), Oh, Goodie! (w-131886 / c-131889)
Ink:  Cherry Cobbler, Basic Black, Whisper White Craft
Extras:  Festive Flurry Framelits Dies (132193), Northern Flurry Embossing Folder (120902), 1 3/4" Circle Punch (119850)

Thanks for looking in today.  I'll share some of our swaps throughout the week.

~ Donna

I Flip for Perfect Blend

I really love the Thinlits Card Dies that make the awesome Flip Cards.  Mix that with one of my favorite stamp sets Perfect Blend and you have a great fun card.  

The idea for this card came from Cindy Beach, thanks Cindy!  Here you can see the cup helps to hold the card closed.  That is one thing with the flip cards, they do have a tendency to spring open pretty easy!  No problem there though since you want to be able to show it off standing up on your desk or counter top.


Recipe for this card:

Card Stock:  Crumb Cake, Cherry Cobbler, Whisper White (the cup looks like it's done on Very Vanilla, but I think that's just the shadow, since it really is in Whisper White).
DSP:  Season of Style DSP Stack (132181)
Stamps:  Perfect Blend (w-130745 / c-131392)
Ink:  Crumb Cake
Embellishments:  Season of Style Designer Washi Tape (132155)
Tools:  Labels Collection Framelits (125598), Label Card Thinlits Die (133479)

Thank you for looking in today.  Here's to a brand new week!

~ Donna

Sunday, September 22, 2013

A Little Thank You

Every month I make little thank you's for the girls who purchase from the monthly workshop.  I really like how this one turned out.  So simple but beautiful too.

The cards are 3" x 3" - just the right size for a little note inside.


For this card, I began with Crisp Cantaloupe card stock (6" x 3" and scored at 3").  The second layer is Baked Brown Sugar (2 7/8" x 2 7/8") and then Whisper White (2 3/4" x 2 3/4").

I inked just the corner of Pleasant Poppies stamp set (w-132061 / c-129499) with VersaMark ink (102283) and inked just the corner of the Whisper White card stock and then coated it with Clear Embossing Powder (109130) and set it with the Heat Tool (129053).  After it cooled off, I used a wedge from one of our Stamping Sponges (101610) and gently inked in smooth circles over the flowers with Crisp Cantaloupe ink.

The "thanks" comes from the latest and greatest Photopolymer set called "Another Thank You" (133454).  I just LOVE the photopoly stamps!  They always have a nice crisp image when stamped.  So beautiful!


Card Stock:  Crisp Cantaloupe, Baked Brown Sugar, Whisper White
Stamps:  Pleasant Poppies (w-132061 / c-129499), Another Thank You - Photopolymer (133454)
Ink:  Crisp Cantaloupe, Baked Brown Sugar, VersaMark 102283
Extras:  Clear Embossing Powder (109130), Heat Tool (129053),  Stamping Sponges (101610).

Thank you for looking in today.  I hope this has inspired you to try something new.

~ Donna

Friday, September 20, 2013

Join My Team!

Join My Team


Is crafting a big part of your life? Wouldn’t you love to earn money while doing something you enjoy? How about the convenience of setting your own hours? If you answered yes to any or all of these questions, then Stampin’ Up! is the perfect opportunity for you. Click the Join Now button to start the process to sign up with me!
 
Even if you just want to be a "Hobby Demo", meaning you are your own best customer, you can do that as well as long as you meet the minimums each quarter.  Did you know that over 80% of Stampin' Up Demonstrators are Hobbyists?  Once you join, if you don't like it, you don't have to stay, but I think you'll enjoy it and want to continue as part of the team.  We have fun, learn new things and gather with others who love to craft.  The most important thing is to have fun doing what you love! 

Doing what I love, and sharing what I love with others are just a few of the benefits that made me decide to become a Stampin’ Up! demonstrator. I love sharing my passion for stamping with family and friends, meeting new people, and having the chance to build a great business doing so. I also get to set my own schedule and that is a definite plus!


Stampin’ Up!’s New Demonstrator Starter Kit is completely customizable! Build your Starter Kit your way! For just $99, you get:
  • Your choice of up to $125 worth of any current Stampin’ Up! products!
  • A business supply pack valued at $65! 
  • That’s a total value of $190! and it is shipped to you for FREE!
Demonstrator Benefits

Demonstrators enjoy many benefits including:
  • Pre-Order before anyone else!
  • Earn FREE Products
  • Product discounts
  • Extra income
  • Flexible schedule
  • Support from Stampin’ Up!
Read more about Demonstrator Benefits details
Career Plan

The Stampin’ Up! Career Plan illustrates all of the different ways demonstrators can earn income.

Read more about the Career Plan including the compensation plan table.
About Stampin’ Up!

Stampin’ Up! has based its product offerings, business model, and decisions on its Statement of the Heart:


Read more about Stampin’ Up!

Click the Join Now button to start the process to sign up with me!


Flower Shop Congratulations

How do you save paper?  Have you ever punched out shapes you need for a card from the mat being used for that card?  No?  Well then, why not?  Rather than use a fresh sheet of paper or having to dig through scraps - use the "unused" paper that will be covered with another layer for any punched pieces you might need.


Below you will see where I punched the three 1/2" circles I needed for my flower centers.  That Basic Black sheet will be (or is) attached to a Whisper White base and will be covered with a Whisper White layer with the flowers attached.


The finished card is 6" x 3 " so it needed a special envelope which I was able to make quickly and easily with the new Envelope Punch Board!


The idea for this card came from Susan Itell from Simple Stampin'.  Thanks Susan!


Recipe:

Card Stock:  Whisper White, Basic Black, Daffodil Delight
DSP:  Brights Color Collection Paper Stack (130134)
Stamps:  Flower Shop (w-130939 / c-130942), Express Yourself - Hostess Set (w-130336 / c-130339)
Ink:  Daffodil Delight, Black StazOn 
Embellies:  Large Pearl Basic Jewels (125577)
Punches:  Pansy Punch (130698), 1/2" Circle Punch (119869)

Thanks for looking in today.  

~ Donna


Thursday, September 19, 2013

Halloween Punch Art

I just love making pumpkins out of our oval punches.  They're always so cute!!  And those bats, so fun.  I was really disappointed when then retired our cute bat punch, but now with the butterfly punches and scallop circle punches, we can make even cuter bats!

Punches Used:

Large Oval (119855), Small Oval (120908)
Word Window - for rounding the fence and the sentiment (119857)
Bitty Butterfly (129406), 7/8" Scallop Circle (129404)
Bird Builder Punch - also used for stems on the pumpkin (117191)
1 1/4" Circle (119861)

Card Stock:  Midnight Muse, Pumpkin Pie, Daffodil Delight, Old Olive, Soft Suede, Basic Black, Chocolate Chip.

Thank you for looking in today!

~ Donna

Wednesday, September 18, 2013

More Photopolymer!

We have two brand-new photopolymer stamp sets available. They're both travel-themed so will be perfect to use in documenting your summer travels and adventures.


Click on any of the pictures to shop now on my website.  Have I mentioned lately how much I love the Photopolymer Stamps!?  

~ Donna

Contributors