Showing posts with label Fancy Fold Card. Show all posts

Monday, September 7, 2020

Whale Done - Triple Cube Card

I spotted the tutorial for making this on Splitcoast Stampers.  She made hers with different DSP and my practice one looks more like the tutorial, but I wanted to make another - it really is very easy - using Whale of a Time DSP and the Whale Done stamp set from Stampin' Up!


Her tutorial is so good, that I'm not even going to try to make my own.  Simply go HERE and follow along.  If you get stuck, there is also a video.  I had to look at the video for how to put the whale in place - hers has a sentiment instead, but I needed to see the process.

Supplies I used:
Whale Done Bundle with Whale Punch
Whale of a Time DSP 
Balmy Blue Cardstock
Granny Apple Green Cardstock
Whisper White Cardstock
Pacific Point Ink Pad

When making your sentiments, simply make the Whisper White small as you need, I cut mine after stamping and then made the Granny Apple Green 1/4" larger.


This is how it will fold flat, and then you'll find it doesn't fit in our standard A2 envelope like this.  Honestly, I nearly panicked after all that work!!


Then I discovered you could fold it into a square and it fits!  Whew!  Simply fold up as shown below.  Be sure all the outside add-ons are outside.


Here it is folded up.


And here it is inside the envelope.  Thank goodness! 


Thank you for looking in today!  I hope you give this a try and share it with a friend!

Happy Monday - and I can say that, because it is a holiday!  Woo hoo!

Happy Labor Day.

~ Donna

Product List

Monday, April 9, 2018

Dragonfly Dreams - Fancy Closure Card

This is the other card we made at Sue's workshop on Saturday.  For those who attended, you might notice a difference in the Designer Series Paper because I wanted to make this from scratch with detailed instructions.  Plus, I like the bright yellow daisies! 

The card was fun to make and will be even more fun watching your recipient open it for the first time!  Let's start with the basic recipe and measurements.


Recipe:
Whisper White Card Stock - 8 1/2" x 5 1/2", scored and folded at 4 1/4"
Delightful Daisy Designer Series Paper 5 1/4" x 4 (inside) 4" x 2" (outside)
Basic Black - scrap for Detailed Dragonfly
Vellum - scrap for Outline Dragonfly

Stamps:  Dragonfly Dreams
Ink:  Garden Green

As you open the card, the dragonfly wings fold up and are pulled through the punched area.


Once completely open, the dragonfly is now inside.  I bet you're thinking... where am I supposed to sign my card or write something to the recipient.  Well, look at the top, there's all the open space you usually see on the bottom of the card.  How cute is that, nice and unique!


To close, gently pull the wings together and put them through the punched area and you're ready to enjoy opening it again.


Once you have the wings on the outside again, gently fold them up to put a little crease in them at the body.


At our workshop we actually did this differently but we found that the wings were over a bit too far off the edge of the card, so today I decided to try this another way.  The original instructions come from Rachel Tessman, thank you Rachel! 

Here's how I re-did the punching and the wings worked great this time.

Before you do any punching, be sure to adhere the 5 1/4" x 4" piece of Designer Series Paper (DSP) to the bottom of the card - the area where you would usually write.

Begin by placing the Classic Label punch all the way in to the edge of the card about 1/2" down from the top and then punch.  Move the punch down about another 1/2" and punch again, being sure to keep the punch straight so it lines up with the first one.


On the front of the card, place your 2" x 4" piece of paper centered over the punched area.  The left edge should be about 5/8" of an inch in from the edge of the card.  


Flip the card open and slide the punch in all the way (if you did it right on the outside, it should work the same inside.).  Gently make the two punches again and you're all set.  This also make punching two separate times easier than punching through the cardstock and the DSP at the same time.
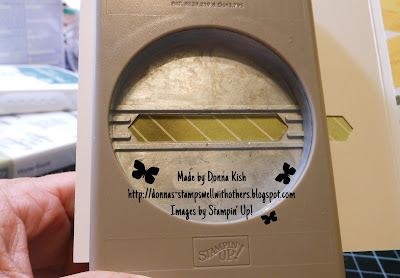


Using our mini glue dots, place three on the back of the dragonfly as shown.  A little tip we learned at the workshop was this - when you put the head of the dragonfly onto the glue dot - press gently and twist it back and forth a bit.  We found that if you pull up the basic black without doing that, sometimes the cardstock would tear and leave a layer of paper behind on the roll of dots.


Line up the vellum outline of the dragonfly with the detailed dragonfly and then press it onto the glue dots.

Add three more glue dots to the vellum and then...


... place the dragonfly onto the card through the punched area.  Make sure you've punched a long enough area for its tail.


Ta Da!  Isn't that easy?  Admit it, you thought it would be hard, but it was very easy!

Thank you for looking in today.  Happy Monday!

~ Donna

Product List

Friday, November 3, 2017

Sharing Swap Cards and November Gift Code

November Hostess Code for free 
FREE Rhinestone Basic Jewels

Use the November Hostess Code:  YEGH6PTW

and place a minimum purchase of $50.00 (before tax and shipping) to receive a pack of Rhinestone Basic Jewels from me!  This offer is only available from me when you purchase from my store.  Your Rhinestones will be sent separately directly from me.


*******************************************************************

Today I want to share Lorri's card from our swaps.  Isn't it beautiful?  This is a fun card that has moving parts, always fun!


Simply pull down on the tag and the card opens up to reveal a present inside!


Inside the finishing touch.  This is such a bold and pretty stamp set.  I love the traditional Green, Red and White Christmas colors.


Thank you for looking in today.  Be sure to check out Lorri's Blog as well.  I'm so proud to have her as my Upline!  Almost 5 years now... one month to go!

Have a Fabulous Friday!

~ Donna

Monday, May 15, 2017

Home Sweet Home

My oldest son and his girlfriend are getting ready to move into a new (to them) house.   Tonight I will be going out to dinner with them for Mother's Day and I'm so excited to get to see the new house.

They just got the keys on Friday, so when I was looking through my emails on Friday, I had one from Brenda Quintana and guess what!  It was a HOUSE!  Well, a Fancy Fold that turns into a house.  How perfect is that?  So of course I watched her video and made one for the kids. 


I checked out the pictures of their home and it is a light gray (Smoky Slate) with a little bit darker roof (Basic Gray) and perfect white window frames (Whisper White).  Well, that makes it easy!  Oh, and the door is black (Basic Black).  I had to add a little bit of color and made the banner over the door with Dapper Denim.


Now, their home isn't a two-story and I suppose I could have just done a single here with only two windows, but I just liked this version so much, I had to go with all four.

I think if I were to do it over, I would add lines to the roof with the line stamp from the set used to make the house - which is Sweet Home and the Thinlits are Home Sweet Home.


I plan to do a photo tutorial of this, but for now, check out Brenda's YouTube video of how she made 
it.  It really is very easy!  

If you are reading this in an email, you may have to go to my blog specifically to see the video.  Simply click on the name StampsWellWithOthers where you see it in your email. 


Thank you for looking in today!  Have a wonderful week.


~ Donna

Contributors