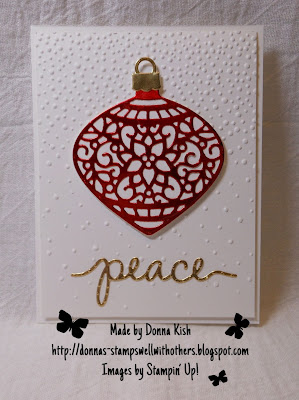
Today's card is the second card I'll be sending down for my class in the mail to my Southern Arizona stampers. When I made it though, I forgot that the Red Foil had retired! Argh!!! But, it's so beautiful, I still wanted to show it here on my blog in case anyone still has some Red Foil they want to use.
Then I updated the kits to Gold and Silver:
Recipe:
Whisper White Thick Cardstock - 8 1/2" x 5 1/2", scored and folded at 4 1/4"
Whisper White Cardstock - 5 1/4" x 4" - using the Softly Falling Embossing Folder
Gold Foil - 2 3/4" x 2 3/4" for Ornament)
Gold Foil for Sentiment
Silver Foil for Ornament Top
Now, here's a tip I want to share with you that I picked up online. It's been rumored that using wax paper or dryer sheets will help your papers come off the dies better, but that they can sometimes damage your dies over long periods. Plus, I found they aren't that great.
Here's what I learned that was new. Take a plastic grocery bag, or that bag your Stampin' Up is delivered in (from your demonstrator) and place it between the die and the cardstock. Oh My Gosh, look how wonderfully this detailed ornament releases from the die! Trust me, try it! You don't even need the precision plate (don't tell SU I said that... lol). I just used my magnetic platform.
Layered "Sandwich":
Platform
Clear Plate
Card Stock
Thin Plastic Bag
Die
Clear Plate.
Another tip that I do just from my own experiences, before you remove your paper from your die, turn it over and be sure all the cuts have gone completely through. I usually run these more intricate dies through 3 times. Trust me, it makes a big difference.
Here you can see that the plastic bag even removes easily.
To keep your liquid glue from oozing out (no matter what kind of glue you use) let it sit for a bit before turning it over and adhering it to your paper. There are a couple of spots below on this picture that are thicker than I would normally do, but it was a new bottle and it got away from me! :)
I adhered the ornament to a solid piece of Whisper White so that I could pop the whole thing up with dimensionals.
Thank you for looking in today! If you have any questions, please contact me or leave a comment below. I love to hear from you!
~ Donna
Product List


