Showing posts with label Stamparatus. Show all posts

Thursday, June 11, 2020

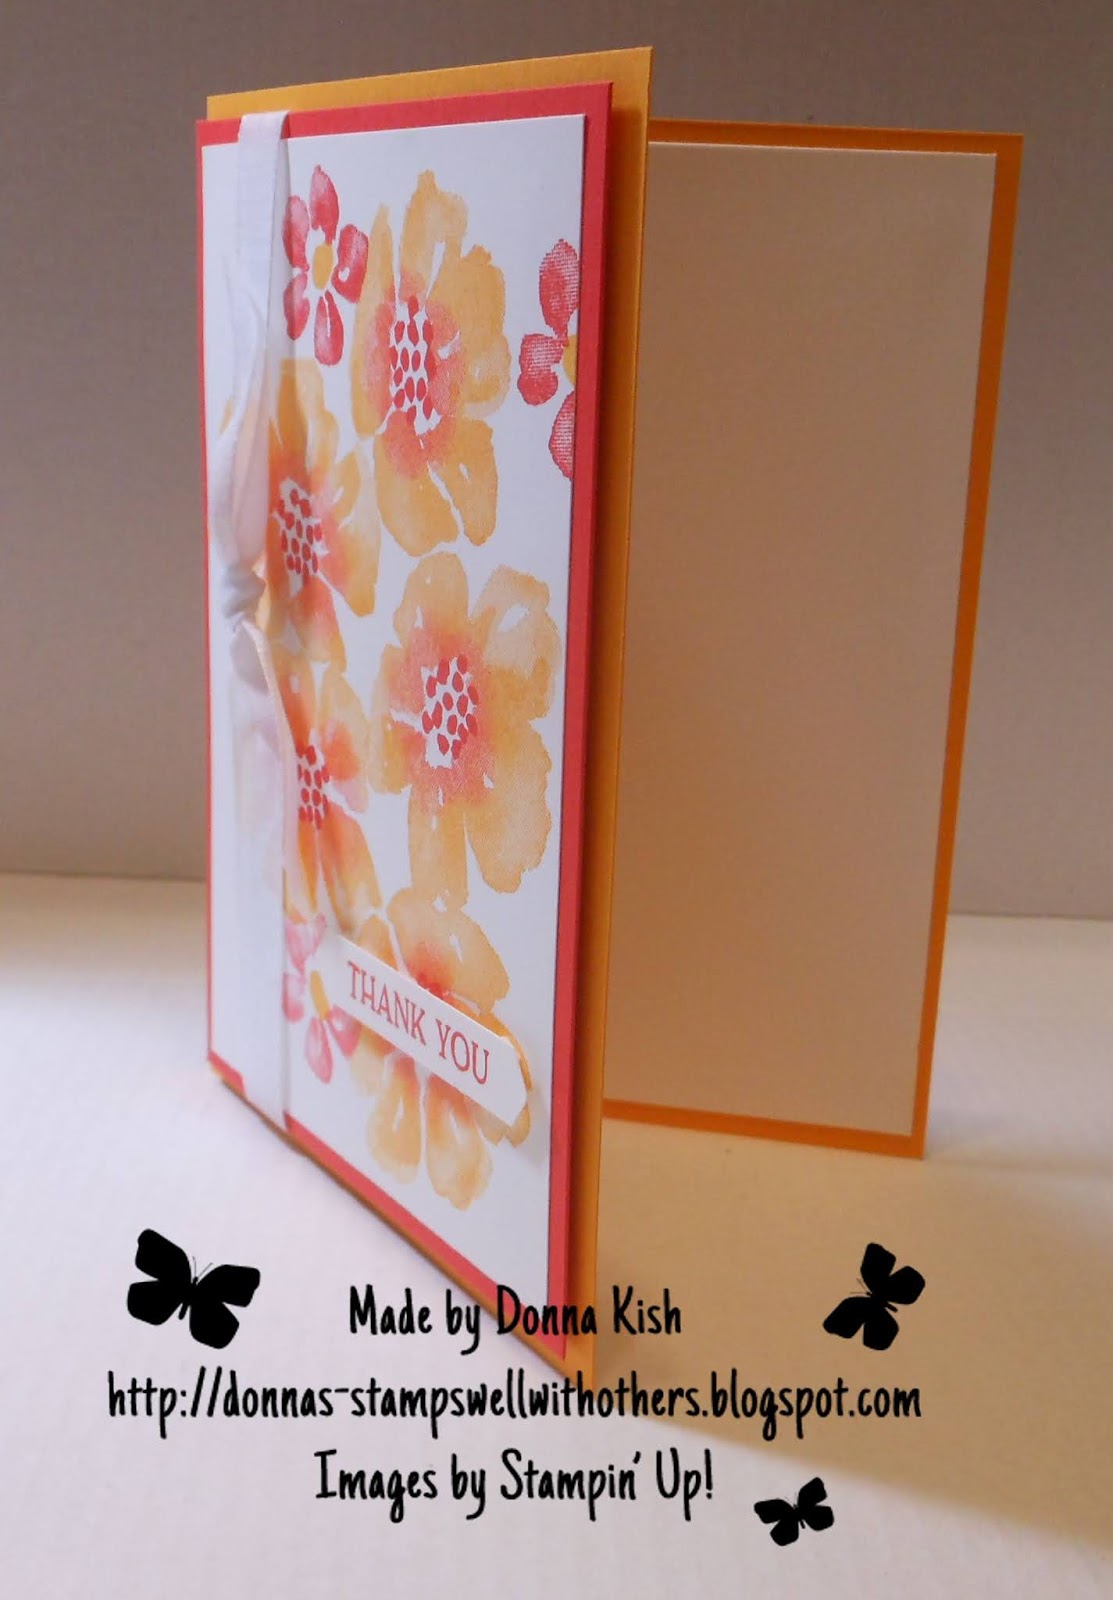
Blossoms in Bloom

Mango Melody and Poppy Parade - what a beautiful combination!  This stamp set is going to be so much fun to play with and experiment with other colors.  The large flowers on these cards are all part of one stamp and the little flowers I stamped individually.

Since it is such a large stamp, I decided to use my Stamparatus instead of a clear block.  I wanted to be sure to get a nice stamped image.  I inked the stamp first with Mango Melody and then using my daubers, I inked the inside edges of the petals with Poppy Parade.  The centers are also stamped with Poppy Parade as well.


Can you spot the differences in the two cards above?  Leave me a reply - I'd love to hear from you!


Recipe:
Mango Melody - 5 1/2" x 8 1/2", scored and folded at 4 1/4"
Poppy Parade - 4" x 5 1/4"
Whisper White - 3 3/4" x 5"
Whisper White - 4" x 5 1/4" - inside panel


Thank you for looking in today.  The weekend is almost here!

~ Donna


Remember - for the month of June - place a $50.00* online order using the hostess code below and I'll send you this beautiful Bumblebee Gingham Ribbon.  *before tax and shipping.


Product List

Saturday, June 29, 2019

Over the Moon Party

These little cows may have partied too hard!  Look at them making a Cow Tower!  This card is made so easily with a little masking and a your Stamparatus.


Recipe:
Sahara Sand - 5 1/2" x 8 1/2", scored and folded at 4 1/4"
Lovely Lipstick - 4" x 5 1/4"
Whisper White - 3 3/4" x 5"

Before you begin, stamp each of the two bottom cows onto the top edge of a post-it note (one for each note) and then fussy cut right at the line to form a mask.  Stamping them at the top of the note allows you to use the stickiness of the post-it (you'll notice mine has washi tape holding it down because I didn't stamp it high enough).

Here is the process.  Place the Whisper White into the corner of the Stamparatus and hold it down with one of the magnets as shown.  Decide where you want the stamp to sit by placing it onto the paper.  Be sure to start low enough that all three will fit.  Close the plate over the stamp to pick it up, ink it and stamp it right where you wanted it.


Use the post-it mask you made before starting and place it over the first cow.


Place the 2nd cow over the post it so you can decide where you want it to be without worrying about it being in the wrong place.


Ta-da!  Perfect placement.


Repeat the post-it placement with the 2nd post-it.


Place cow #3, ink and stamp!


And there they are!  Ready to color and then emboss with the Subtle Embossing folder.  I made one without the embossing and believe me, it looks so much nicer WITH the embossing step.


I colored with Stampin' Blends - Basic Black, Smoky Slate, Lovely Lipstick, Old Olive and Petal Pink.

Thank you for looking in today!  It's Saturday!  Finally!

~ Donna


Product List

Wednesday, February 6, 2019

Dandelion Rainbow Wishes

I spotted this on Beth's Paper Cuts and fell in love so hard that I had to give it a try.  It is so very easy to do and look how pretty it turns out.  I've always liked the Dandelion Wishes stamp set but stamping it onto watercolor paper and adding some quick dabs of ink with our Aqua Painter and only three ink pads makes it an even bigger favorite.

Since you will be stamping on watercolor paper, I recommend stamping with your Stamparatus so you can ink up the sentiment a couple of times.  See the un-colored version below on the Stamparatus and you can see that the the sentiment didn't stamp wet enough with the roughness of the paper.  I inked the sentiment a couple of times more and it was perfect.  The dandelion doesn't have to be dark and will look better with just one inking.


Be sure to use StazOn ink since you will be watercoloring so the ink won't run.  Once it is dry, take out your three colors, yes, just three!

Start with Melon Mambo.  Squeeze the lid to the ink pad  to get some ink there to work with.  Using your Aqua Pen squeeze some water onto the lid and mix up the ink.  Then carefully dab some color to the first area you wish to color.  

Clean your brush thoroughly with your Stampin' Scrub and then move on to Daffodil Delight.  

Do the same steps as above, but skip a few "flowers" so you can come back and color them orange.  Think of the color wheel from school.  Instead of Red, you're starting with Melon Mambo, mixed with Daffodil Delight will give you Orange, then Pacific Point mixed with Daffodil Delight will give you Green.

Next clean your brush again and pick up some Pacific Point and skipping a few flowers after the Yellow, paint the blue.

On a clear block, pick up some Melon Mambo (clean your brush) and pick up some Daffodil delight and mix them together to make Orange.  It helps to put a piece of white paper under the block to see your colors as you mix them.  Color the flowers between the Mambo and Delight.

Clean your brush and pick up some Daffodil Delight to your clear block (clean your brush) and pick up some Pacific Point.  Mix together to get Green.  ALSO - color the stem with the green that you made.

Clean your brush (do you see that this is an important step??  LOL) and do the same with Pacific Point and Melon Mambo to make Purple.


Recipe:
Daffodil Delight - 5 1/2" x 8 1/2", scored and folded at 4 1/4"
Basic Black - 4" x 5 1/4"
Watercolor Paper -  3 3/4" x 5"
Whisper White - 4" x 5 1/4" (inside panel)

Stamps - Dandelion Wishes
Ink - StazOn Black
Ink Pads - Melon Mambo, Daffodil Delight, Pacific Point


Here you can see how stamping the sentiment just once, just isn't enough.  That is when the Stamparatus does it's best work!  Yay for Stamparatus!  Do you ever call it Stampasaurus?  I do! 


Thank you for looking in today!  Happy Hump Day!

~ Donna


Product List

Contributors