Monday, January 27, 2020

Taco 'bout Witty!

Do you love fun cards?  Of course you do!  Well, this is the stamp set for you then,  Witty-Cisms.  Here's my first go at using the Taco stamp.  I made two versions, one a Retirement card and the 2nd a Birthday card.


Recipe:
Whisper White Thick cardstock - 5 1/2" x 8 1/2", scored and folded at 4 1/4"
Basic Black - 2 3/4" x 5 1/2"
Real Red - 2 1/2" x 5 1/2"
Whisper White scraps for sentiments and tacos circle from layering circles dies. (I used my retired 1 1/4" circle punch) 

Stamps:  Witty-Cisms
Ink:  Real Red, Memento Black

Now... before you go any further.... take a deep breath because this is the only way to get the images stamped the way I wanted them.

Here is the before: (ignore the washi-tape - I'll explain that in a minute)


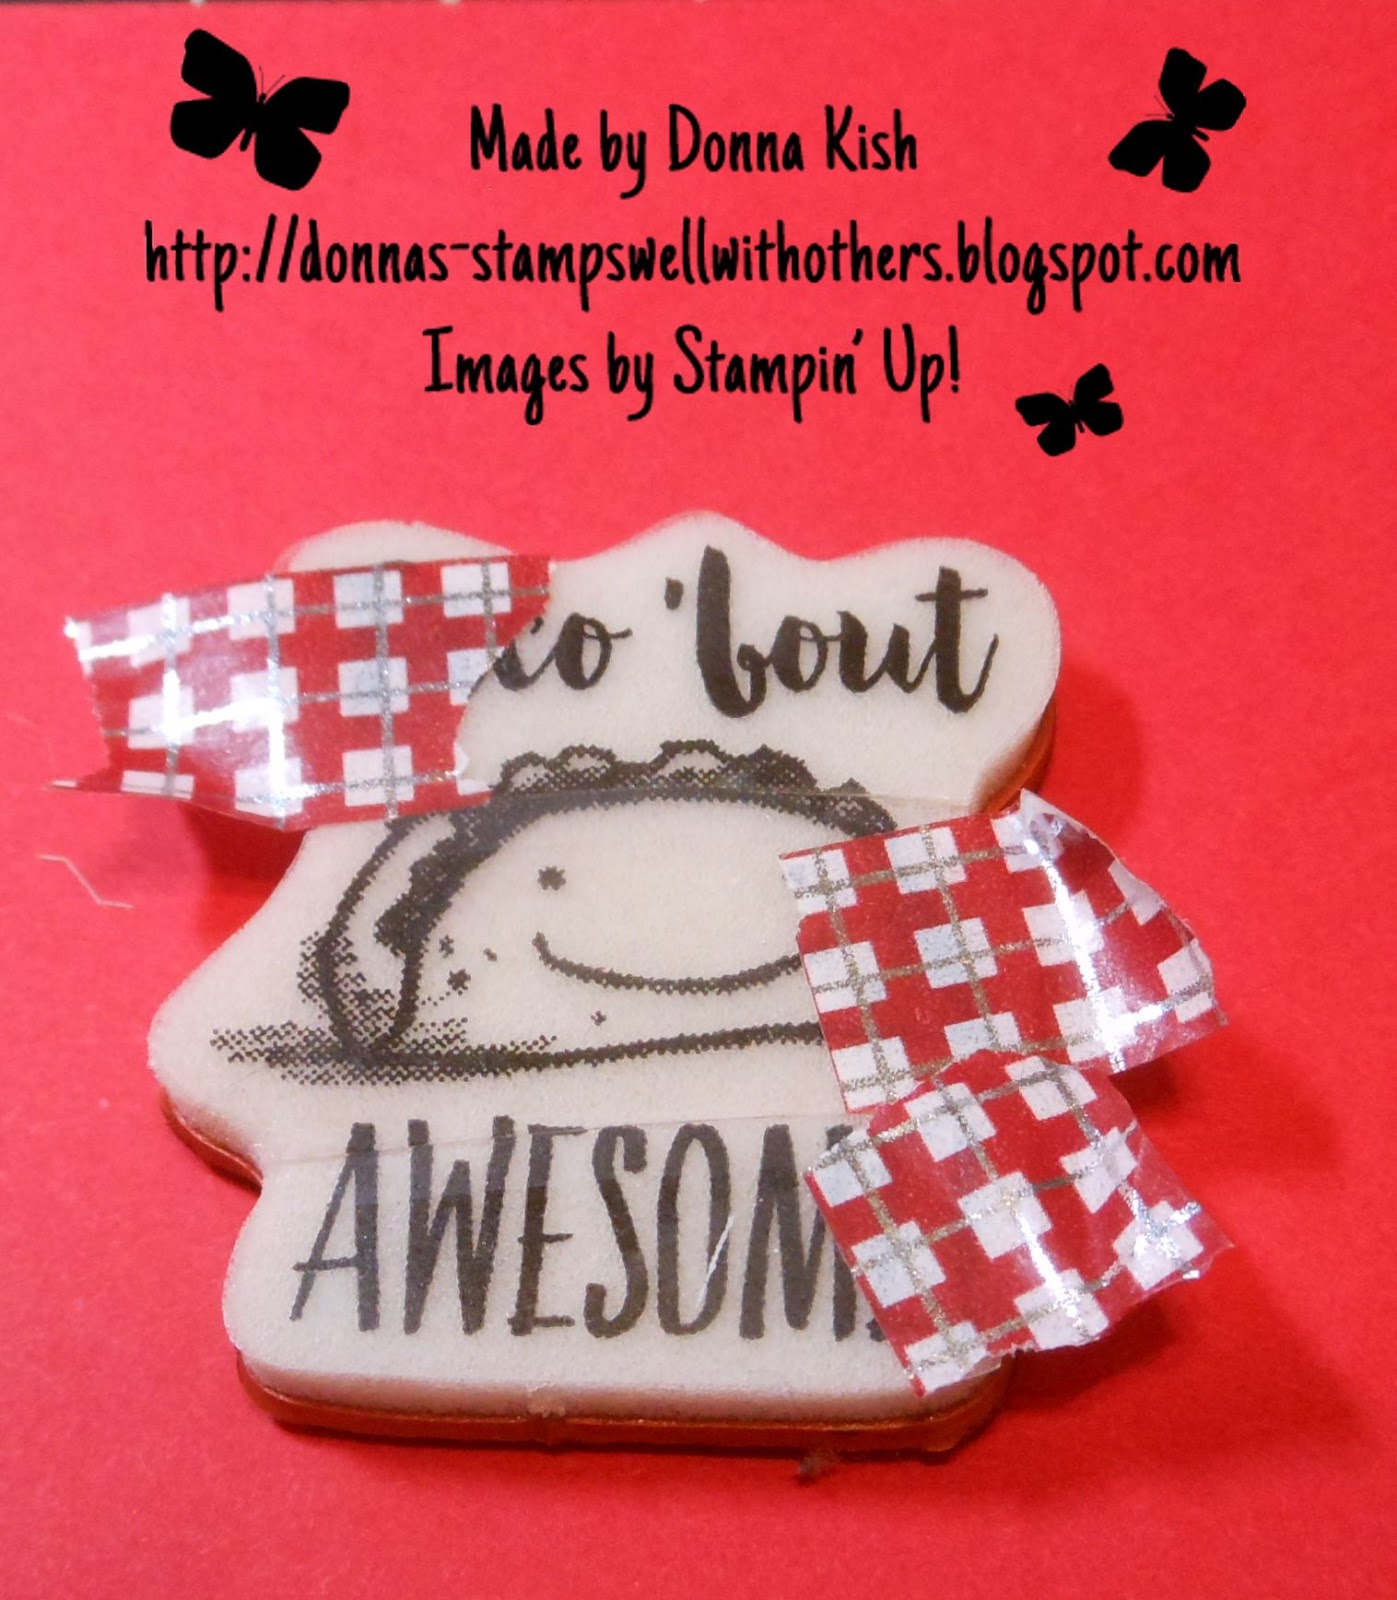
Here is the after, yup... I cut them up!  ACK!!!  okay, keep breathing, it's just fine, I promise. 

Now, about the washi-tape.  With the new "cling" stamps, the stickers that go on them are really STICKY and I have an impossible time unsticking them from the stamp box and the clear block if I don't have a way to get a hold of the stamp.  The washi-tape gives me an area that isn't sticky and allows me to lift them up without damaging the foam.

(Before you say anything about how it looks like I cut this badly, I cut the stamp apart from looking at the stamp side, not the label side.  This particular set of stamps wasn't cut correctly from the factory, so the back looks different from the front.  The important side is cut apart according to the stamp, not the label.)


Remember to save on paper by cutting the scallop circle from the Basic Black that will be hidden behind the Real Red.  (I used the 1 3/8" Scallop Punch) I stamped the taco onto the Real Red with Real Red Ink.


Here is the Birthday Card.  All stamps are from Witty Cisms.

Oh, and I colored the tacos with Light Daffodil Delight Stampin' Blends and then colored over that with Light Crumb Cake Stampin' Blends.  I added a little shadow with Light Smoky Slate and lettuce with Dark Granny Apple Green Stampin' Blends.


Thank you for looking in today.  It's a MONDAY again.... here we go!

~ Donna

Product List

Sunday, January 26, 2020

Tri-Level Fun Fold

The From My Heart Specialty Designer Series Paper has so many pretty patterns.  This card allows you to see more than one on a single card.  Now that I've completed it though, I've learned something important.  It won't stand up to display!  So, I suggest making the base a full card and then adding the layers to the front of that. 


Recipe:
Real Red - as made - 4 1/4" x 5 1/2" (does not fold in half)
Real Red - as a better plan - 5 1/2" x 8 1/2, scored and folded at 4 1/4"
Blushing Bride - 4" x 5 1/4"
Real Red - 3 1/4" x 4 1/2"

Whisper White - 4 1/4" x 11" - scored on the 11" side at:
   1 1/2", 3", 5 1/2", 8"

Designer Series Paper (DSP):
4" x 2 3/4" (largest)
4" x 2 1/4" (middle)
4" x 1 1/4" (smallest - front)

Add the DSP to the white panels as shown below with the smallest on the front panel.  Stamp your inside sentiment on the panel just to the left of the largest panel.


The front design is punched with the scallop heart punch from one of the DSP patterns and attached to the Heart Doilies.  Then popped up with Dimensionals.  Be sure to only put the Dimensionals on the left side (on the back) of the heart so it opens and doesn't attach to the 2nd panel.


Thank you for looking in today.  See below for ordering options to duplicate this card.  Remember, during January purchase $50.00 or more and use Hostess Code DYXDZVFR and receive a free gift from me.

Have a Blessed Sunday!

~ Donna


Product List

Saturday, January 25, 2020

Happy Anniversary to my Hubby

So yesterday I promised to show you the Anniversary Card I made for hubby and here it is.  A big Thank You to LeeAnn Greff for her wonderful Accordion Heart Doilies idea.  I loved it so much I simply had to do the same thing inside the card I made for Mark.


My Recipe:
Blushing Bride - 5 1/2" x 8 1/2", scored and folded at 4 1/4" **
From My Heart Specialty Designer Series Paper - 3 1/4" x 5 1/4"
Whisper White - 3 1/2" x 4 3/4" (cut two - inside panels)

** Technically Flirty Flamingo is the "matching color", but apparently I was out... (yikes) and Blushing Bride looks perfect.


I punched out one of the foil hearts from the DSP with the Scallop Heart Punch, stamped my sentiment with Real Red and then popped it up with Stampin' Dimensionals on the back of one of the Heart Doilies and attached it to the front of the card.

For inside, I took 4 of the Heart Doilies and folded them in half, making sure to line up the scallops so they match up perfectly. 


Using just a small amount of liquid glue, attach the hearts together one at a time, also being careful to line up the scallops so they match from one heart to the next.


Once the glue is completely dried, place the hearts lined up in the middle of the panel of Whisper White that you've centered inside the card.  Place a small amount of glue in the same place you did in attaching them to each other and place it down as shown below.  Then add a bit more glue to the same location on the heart that is folded over (see this picture below) and close the card so that it attaches to the front inside panel.


When opened (after being well dried) it will look like this below.  Stamp as desired.


Isn't this just adorable!?  Thank you again to LeeAnn!


We had a great day and enjoyed having a Friday together to celebrate.  So much less people out and about during the week than on a weekend!  Got in to all our favorite places without a crowd!

Thank you for looking in today!  Have a wonderful weekend!

~ Donna


Product List

Contributors