Showing posts with label Delicate Ornaments. Show all posts

Tuesday, July 26, 2016

Christmas in July

Today's card is the second card I'll be sending down for my class in the mail to my Southern Arizona stampers.  When I made it though, I forgot that the Red Foil had retired!  Argh!!!  But, it's so beautiful, I still wanted to show it here on my blog in case anyone still has some Red Foil they want to use.


Then I updated the kits to Gold and Silver:


Recipe:

Whisper White Thick Cardstock - 8 1/2" x 5 1/2", scored and folded at 4 1/4"
Whisper White Cardstock  - 5 1/4" x 4" - using the Softly Falling Embossing Folder
Gold Foil - 2 3/4" x 2 3/4" for Ornament)
Gold Foil for Sentiment
Silver Foil for Ornament Top


Now, here's a tip I want to share with you that I picked up online.  It's been rumored that using wax paper or dryer sheets will help your papers come off the dies better, but that they can sometimes damage your dies over long periods.  Plus, I found they aren't that great.

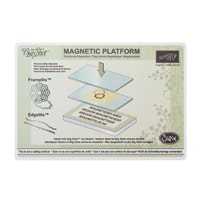
Here's what I learned that was new.  Take a plastic grocery bag, or that bag your Stampin' Up is delivered in (from your demonstrator) and place it between the die and the cardstock.  Oh My Gosh, look how wonderfully this detailed ornament releases from the die!  Trust me, try it!  You don't even need the precision plate (don't tell SU I said that... lol).  I just used my magnetic platform.

Layered "Sandwich":
Platform
Clear Plate
Card Stock
Thin Plastic Bag
Die
Clear Plate.

Another tip that I do  just from my own experiences, before you remove your paper from your die, turn it over and be sure all the cuts have gone completely through.  I usually run these more intricate dies through 3 times.  Trust me, it makes a big difference.


Here you can see that the plastic bag even removes easily.


To keep your liquid glue from oozing out (no matter what kind of glue you use) let it sit for a bit before turning it over and adhering it to your paper.  There are a couple of spots below on this picture that are thicker than I would normally do, but it was a new bottle and it got away from me!  :)


I adhered the ornament to a solid piece of Whisper White so that I could pop the whole thing up with dimensionals.


Thank you for looking in today!  If you have any questions, please contact me or leave a comment below.  I love to hear from you!

~ Donna

Product List

Friday, November 13, 2015

Delicate Ornament Christmas

I spotted this beauty on Kay Kalthoff's blog and fell instantly in love with it!  So on Wednesday (which was the Veteran's Day Holiday from my "day" job) I spent the day with friends making Christmas Cards where I made several varieties of this one.

Thank you Kay!  I love this idea!


Recipe:  
Base: 8 1/2" x 5 1/2", scored at 4 1/4"  (I used Real Red for some and Basic Black for others)
Softly Falling Embossed layer:  Shimmery White:  5 1/4" x 4"
Mat (red or black): 4 1/4" x 2 3/4"
Ornament Layer:  Shimmery White :  4" x 2 1/2"
Layer beneath the ornament:  2 1/2" x 2 1/4"

Stamp the sentiment you wish to use first along the bottom of the ornament layer.  I used one from Reason for the Season (139730) which bundles with the Festive Flower Builder Punch (140847 - bundle).


Then carefully using the small delicate ornament place it centered and above the sentiment, leaving room to tie a ribbon around the top.  If there isn't enough room to tie a ribbon around the top of the card, then simply tie a pretty bow and attach it to the top of the ornament.


To get the design to go inside your ornament, simply take the ornament that was cut from the Shimmery White (or if you wish another color such as gold foil, silver foil, red foil, etc.) and trim it as shown in the picture below.  Simply snip off the top and the bottom.


As you can see, I left one of them whole here and it looks awesome too!


Below are more samples to see.  I only wish you could see how beautiful as the Shimmery White paper looks.  If you haven't ever used it, I highly recommend it.  It is gorgeous!


If you are a subscriber to my blog, most likely you receive my blog posts in your email.  If so, you may not be seeing everything that is available.  The other day I posted a YouTube video from Stampin' Up! and when the email came to me (yes, I subscribe to my posts at a different email address, so I can see how they look to you.)  There was no video in the email, but it was on the blog.

To see the full blog post, simply click on the Title at the top of the email and you should be sent to the blogspot page.  Then you should be able to see any videos posted as well as the supply list I often place at the bottom.  Give it a try!

Thank you so much for being a loyal reader and customer!  I'm so happy to have you take the time to check in.

~Happy Friday!

Donna

Click below for Stampin' Supplies.


Built for Free Using: My Stampin Blog

Contributors