Showing posts with label Watercolor Paper. Show all posts

Wednesday, February 6, 2019

Dandelion Rainbow Wishes

I spotted this on Beth's Paper Cuts and fell in love so hard that I had to give it a try.  It is so very easy to do and look how pretty it turns out.  I've always liked the Dandelion Wishes stamp set but stamping it onto watercolor paper and adding some quick dabs of ink with our Aqua Painter and only three ink pads makes it an even bigger favorite.

Since you will be stamping on watercolor paper, I recommend stamping with your Stamparatus so you can ink up the sentiment a couple of times.  See the un-colored version below on the Stamparatus and you can see that the the sentiment didn't stamp wet enough with the roughness of the paper.  I inked the sentiment a couple of times more and it was perfect.  The dandelion doesn't have to be dark and will look better with just one inking.


Be sure to use StazOn ink since you will be watercoloring so the ink won't run.  Once it is dry, take out your three colors, yes, just three!

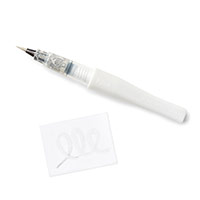
Start with Melon Mambo.  Squeeze the lid to the ink pad  to get some ink there to work with.  Using your Aqua Pen squeeze some water onto the lid and mix up the ink.  Then carefully dab some color to the first area you wish to color.  

Clean your brush thoroughly with your Stampin' Scrub and then move on to Daffodil Delight.  

Do the same steps as above, but skip a few "flowers" so you can come back and color them orange.  Think of the color wheel from school.  Instead of Red, you're starting with Melon Mambo, mixed with Daffodil Delight will give you Orange, then Pacific Point mixed with Daffodil Delight will give you Green.

Next clean your brush again and pick up some Pacific Point and skipping a few flowers after the Yellow, paint the blue.

On a clear block, pick up some Melon Mambo (clean your brush) and pick up some Daffodil delight and mix them together to make Orange.  It helps to put a piece of white paper under the block to see your colors as you mix them.  Color the flowers between the Mambo and Delight.

Clean your brush and pick up some Daffodil Delight to your clear block (clean your brush) and pick up some Pacific Point.  Mix together to get Green.  ALSO - color the stem with the green that you made.

Clean your brush (do you see that this is an important step??  LOL) and do the same with Pacific Point and Melon Mambo to make Purple.


Recipe:
Daffodil Delight - 5 1/2" x 8 1/2", scored and folded at 4 1/4"
Basic Black - 4" x 5 1/4"
Watercolor Paper -  3 3/4" x 5"
Whisper White - 4" x 5 1/4" (inside panel)

Stamps - Dandelion Wishes
Ink - StazOn Black
Ink Pads - Melon Mambo, Daffodil Delight, Pacific Point


Here you can see how stamping the sentiment just once, just isn't enough.  That is when the Stamparatus does it's best work!  Yay for Stamparatus!  Do you ever call it Stampasaurus?  I do! 


Thank you for looking in today!  Happy Hump Day!

~ Donna


Product List

Wednesday, July 5, 2017

You Want How MANY?

If someone asks you to make 50 cards, think very carefully about saying yes... LOL

Actually, it's not so bad and I wouldn't have even considered saying no for this one.  My sweet "almost a daughter" Brittney called the other day from Texas as she's preparing for her Mother's funeral and asked if I could make 50 Thank You cards that they could use to send out after the services to those who helped out during this rough week.

She wanted "to start" with 50.... ack!  ha ha... I'll make however many she needs.  I'll show you the finished card once I have it completed with the inside verse and finishing touches.


Above is watercolor paper waiting to be stamped, powdered and heat embossed.  It's a lot of steps, but it was really what I wanted to make for her.  The only request was to use purple.  I decided on Wisteria Wonder.

Below are ready to be painted / colored.


What is it that first got you excited about using Embossing Powder?  For me, it was seeing that dry dingy powder turn before my very eyes into shiny beautiful lines.


THIS Misti has made this job bearable.  BIG thanks to Patti I. for giving this to me a while ago.  As I started to make the card, I realized I never bought the big giant clear block and I needed it for this stamp.  Suddenly it occurred to me... MISTI!  This has been the best tool to make this stamping step easier and consistently perfect.


Ok, so here's a sneak peek at a layer of card.  They will all look different depending on how the water and ink blend and move over the paper.
  I  

Okay, off to bed I go (it's 11 p.m. Tuesday) and after having the last four days off, not sleeping in is going to be tough.

Happy Hump Day!

~ Donna

Sunday, August 28, 2016

Merry Christmouse!

Have you tried this yet?  I saw someone else use this technique and I had to try it. Now I want all my cards to shimmer and shine!

Click on the picture.  It should open to a larger picture and see the sparkle in the coloring.  I stamped with Black StazOn onto watercolor paper and then colored from the lid of my stamp pads using my Clear Wink of Stella Pen.  Oh My Goodness - so beautiful!


The little mice in this set are so adorable.  I'll be coloring more of them with Wink of Stella..


Recipe:
Base - Crumb Cake - 11" x 4 1/4", scored and folded at 5 1/2"
Serene Scenery Designer Series Paper Stack - 5 1/4" x 4
Crumb Cake and Island Indigo - 3 5/8" x 2 3/4"
Watercolor Paper - 3 3/8" x 2 1/2"


Thank you for looking in today - may you have a Blessed Sunday!  ~ Donna

Product List

Wednesday, July 27, 2016

Watercolor Stamping Technique

Today I want to share with you a video from Stampin' Up!  This is such a fun technique that can give your cards a different look every time.


To purchase any items you've seen here, simply click the pictures below and remember, only a few more days to earn Bonus Days Coupons to use in the month of August!  For every $50 spent in July, you will receive an email from Stampin' Up! with a coupon code you can use for $5.00 off.

Thank you for looking in today!  ~ Donna


Product List

Contributors