I've seen a couple of these online lately, one by my upline, Lorri Heiling, but she made up her own instructions from one she'd seen on Pinterest, so I kept searching and found that Becky Roberts had easy to understand instructions. So I made up a set of instructions for mine as well.
If you click on the picture, it should open as a bigger picture. Read through all the instructions before you begin.
Start with a piece of Basic Black card stock cut at 4 1/2" x 11". Score at 5 1/2" and fold tight with bone folder.
First you need to cut the legs. With the open end of the card on your cutter, line up the edge at 1/2" and cut into the card for 1 1/2".
Flip the card over and cut the other side's legs with the open end of the card again, line up at 1/2" and cut into the card for 1 1/2".
Turn the card so the bottom is lined up at 1 1/2", move your cutter in 1/2" and then cut in between the two 1/2" cuts for the legs. You may need to use your snips if cutting through two sheets of Basic Black card stock doesn't work. It's pretty thick and a little hard to cut through 2 layers.
It should look like this when done cutting. The first picture has lines drawn so you can see where I cut. If you want to make marks to cut first, I recommend using pencil so you can erase it if you don't line up with your cutter exactly.
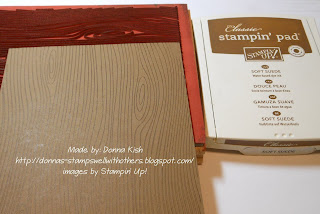
Using a piece of Soft Suede card stock cut at 5 1/2" x 4 1/4" ink up the Woodgrain background stamp (117100) with Soft Suede ink.
Cut two 1/2" strips, first from the long edge and then turn the card stock and cut two 1/2" strips from the short edge.
Attache the strips to the chalkboard (Basic Black card stock). You'll need to trim the cross bars (the short pieces) if you don't want them to over lap. I used my craft knife.
Stamp your image with Craft White Ink and then take a tissue and gently rub the ink before it has time to dry. Dab your tissue on to the ink pad and randomly wipe it around the image to look like an erased chalk board.
Punch with your favorite small punch or variety of punches. Punch a 1/16" hole (a soon to be retiring punch!) and string them together with Baker's Twine. Notice the needle threader? That is the best non-SU tool I've ever purchased! It is the only way to thread through that incredibly small hole! Makes it soooo easy!
Add your favorite ribbon to the ends to decorate the card a bit more and add some bling. Everything is better with bling!
Don't miss your favorite stamps and accessories that will be retiring soon.
and remember - the accessories are only while supplies last!
I am having a RETIREMENT PARTY on Saturday, May 4th, but you can order now using our Hostess Code A4E3GRHS to receive your order quickly and directly to your house. Order right away if you are concerned about any items selling out!
This will show you where to put the Hostess Code:
Thank you for looking in today. Happy Friday!
~ Donna

.jpg)
.jpg)
.jpg)
.jpg)
.jpg)
.jpg)
.jpg)
.jpg)
.jpg)
.jpg)
.jpg)
.jpg)


You should bring this to show at the Willcox gathering since everyone there is either a schoolteacher or a retired schoolteacher, with 1 or 2 exceptions. They'd LOVE it!
ReplyDeleteThat's a GREAT idea! It's so easy to do too. I'm excited to come down there. My order should be in today with the Scrapbooking Stuff I bought, so I'm anxious to start playing with that too for your workshop.
ReplyDeleteCan't WAIT!
ReplyDeleteWOW Nice job Donna!! Great tutorial and easy to understand instructions! Tutorials take some time don't they???? Keep up the great work!
ReplyDeleteThanks Lorri! They sure do take time and trying to remember to take a picture of each step without just going on automatically. LOL
ReplyDelete